How to Use Before-and-After Photos to Grow Your PDR Business
Turn Dents Into Dollars™ teaches technicians not only how to remove dents, but how to build a business around the skill. One of the most powerful tools a Paintless Dent Repair (PDR) technician can use to attract new customers is the before-and-after photo. These images show the transformation that happens when a dent is repaired correctly. They build trust instantly because they demonstrate skill, precision, and value without requiring explanation. A great before-and-after photo does what words cannot — it proves ability. Customers believe what they see. Dealership managers make decisions based on confidence. Retail clients choose technicians who show results. Before-and-after photos turn invisible skill into visible credibility.
Every dent tells a story. The “before” is the moment of frustration, damage, or disappointment. The “after” is relief, restoration, and pride. When potential customers see this transformation, they immediately understand the benefit of PDR. The more clearly the transformation is shown, the easier it becomes to close sales, win dealership accounts, book retail work, and increase your pricing confidence. The photos sell the repair — you just perform it.
“You don’t have to persuade people that you’re skilled. You only have to show them.”
Why Before-and-After Photos Matter
PDR is a visual craft. The result is something a customer can see instantly. But before the repair happens, customers cannot always imagine what the vehicle will look like afterwards. Many worry that the dent will still be visible, that the panel may crack, or that the repair will be obvious. Before-and-after photos show them real proof that PDR preserves factory paint and restores the surface with clarity. They eliminate doubt. They make the decision easier. When customers see clear transformation, they trust not only the service — they trust you.
Photos also create authority. The technician who documents repairs looks professional, established, and confident. This is how technicians become the go-to name in their area.
How to Capture a Proper “Before” Photo
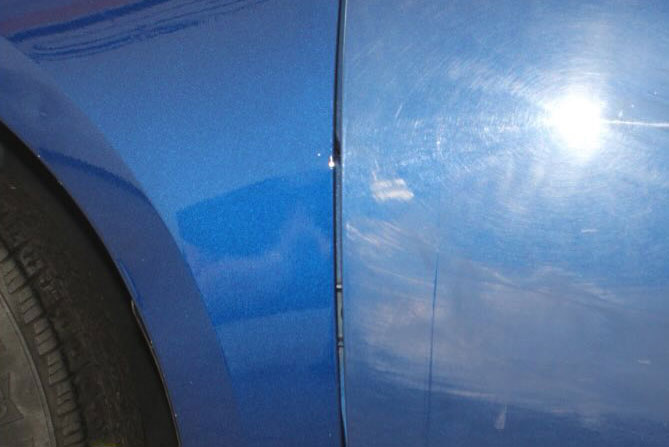
A good “before” photo is clear, close enough to reveal the dent, and shot at an angle that shows the distortion in the reflection. The purpose is to communicate the damage, depth, and disruption. The lighting must reveal the dent clearly. If the dent is not visible in the photo, the viewer cannot appreciate the repair.
To capture effective before photos:
-
Position the reflection line so the dent is visible.
-
Take the shot at an angle where the distortion is obvious.
-
Keep the camera steady and frame only the affected panel.
-
Ensure the lighting highlights the crease, low, or depth clearly.
This is not just documentation. It is storytelling.
How to Capture the “After” Photo
The “after” photo should be taken from the exact same angle and distance as the “before” photo. This is what allows the viewer to see the change. If the angle is altered, the comparison loses clarity. The after shot demonstrates surface smoothness, reflection uniformity, and finish preservation.
To capture effective after photos:
-
Recreate the same camera position from the before shot.
-
Use the same lighting angle to show that nothing is hidden.
-
Allow the reflection to run cleanly and evenly across the surface.
-
Avoid glare, shadows, or cropped framing that hides detail.
Consistency proves authenticity.
Consistency Builds Trust
When every before-and-after is photographed consistently, your portfolio gains power. Customers see not just one successful repair, but a reliable pattern of successful repairs. This pattern creates brand trust. Dealership managers and retail clients look for repeatability — not luck. Before-and-after photos communicate repeatability instantly.
How Before-and-After Photos Help Convert Customers
Customers decide based on what they feel when they see the results. When the repair is visible, the emotional connection happens immediately. That emotional reaction drives buying decisions faster than technical explanations or pricing breakdowns.
People don’t buy repairs. They buy the feeling of getting something back that they thought was lost.
Where to Use Before-and-After Photos
| Platform | Purpose | Customer Impact |
|---|---|---|
| Website | Demonstrates credibility | Builds trust before contact |
| Google Business Profile | Attracts local customers | Increases call and quote requests |
| Social Media | Shows ongoing activity | Keeps your business top-of-mind |
| Sales Presentations to Dealerships | Demonstrates reliability | Expedites vendor approval |
| In-Person Estimates | Helps close on-the-spot repairs | Reduces price resistance |
Before-and-after photos are an asset — a salesperson that works 24/7.
Why Photos Strengthen Pricing Confidence
When a technician is unsure about pricing, they often undercharge. But when you can show high-quality before-and-after results, you no longer have to justify your price. The photos do it for you. Customers who understand the value rarely ask for discounts. They see the transformation and recognize the fairness of the price.
“Price becomes easier to state when proof is already visible.”
Confidence rises with documentation.
How to Turn Photos Into Marketing Results
Photos alone are powerful — but when presented with context, they drive action. A simple caption such as “Factory paint preserved — dent completely restored” communicates exactly what the customer is getting. When posted consistently, your brand becomes associated with quality, clarity, and trust.
When potential clients think “Who can fix this?” your business is the first they remember.
Key Takeaways
Before-and-after photos are one of the strongest tools for growing a PDR business.
They create trust, build authority, and simplify the sales process.
Consistency in angle, lighting, and framing ensures credibility and clarity.
Photos help justify pricing and increase customer confidence instantly.
FAQs
Q: What if a dent is too small to show clearly in photos?
Use reflection lines or angled lighting to reveal the distortion.
Q: Can phone cameras capture good before-and-after photos?
Yes. Phone cameras are more than capable when used with correct angles and lighting.
Q: How many photos should I post per week?
Consistency matters more than volume. Even 2–3 per week creates strong presence.
Closing Statement and Call to Action
Turn Dents Into Dollars™ teaches you how to build skill and how to build business. Before-and-after photos transform your repairs into proof, your work into credibility, and your skill into revenue. If you’re ready to learn not only how to perform PDR, but how to grow a thriving income with it, call 800-304-3464 and we’ll guide you every step of the way.